
Zinc Alloy Die Casting Process for Custom Metal Promotional Gifts
This is the core manufacturing process we use for the majority of our metal promotional products — including custom lapel pins, challenge coins, badges, keychains, medals and bottle openers. The same zinc alloy die-casting, plating and coloring workflow applies across these categories.We run our own zinc alloy die casting line. We are not a trading company that subcontracts your order. Design, mold making, die casting, plating, colour filling, assembly and packing all happen inside one factory site in Huizhou, so you never have to manage three suppliers for a single order.
The forming stage is identical across these categories. What differs is size, thickness and the surface finishing that follows, so the process below applies to a bookmark or a golf divot tool exactly as it does to a challenge coin. The 11 stages are listed in the order your order actually moves through them. For each stage you get the equipment, the parameters and, most importantly, what that stage decides for the finished product.
What Happens to Your Order, Stage by Stage
Eleven stages stand between an approved artwork and a closed carton. The table gives you the full picture first, and each stage is broken out below. Read the last column carefully. Most quality failures are not a missing stage, but a stage that was done thin.
|
Stage |
Process |
Key Equipment / Materials |
What It Determines |
|---|---|---|---|
|
1 |
PS, AI, CDR |
Whether the artwork can hold a mold, and whether detail survives |
|
|
2 |
Mold Making |
Beijing JDPaint, CNC engraving machine, EDM machine, heat treatment furnace |
Relief depth, edge sharpness, mold life |
|
3 |
88-ton and 25-ton hot chamber machines, Zamak 3 |
Density, porosity, gate marks |
|
|
4 |
Polishing |
Wet integrated grinder, taro wheel, abrasive belt, hemp wheel, nylon wheel, polish wax |
Edge feel, adhesion of the plating layer |
|
5 |
Riveting |
Bench drill, butterfly clutch, screw post, safety pin, simple pin |
Accessory retention, clutch life |
|
6 |
Plating tank, electrophoresis tank, spray gun and water curtain booth |
Colour, gloss, oxidation and wear resistance |
|
|
7 |
Pantone card, rotary vane vacuum pump, MST-V4P automatic colouring machine |
Colour deviation, bleed boundary, depth of the fill |
|
|
8 |
UV flatbed printer, pad printer, vacuum screen printing machine |
Graduated colour and photographic detail |
|
|
9 |
Laser Marking |
Laser marking machine |
Engraving sharpness and permanence |
|
10 |
Ultrasonic welder, magnets, clasps, ribbons |
Structural completeness and function |
|
|
11 |
PP bag, blister box, velvet pouch, paper box |
Transit damage and unboxing |
Stage 1 to 2: Design and Mold Making
Half the quality of a finished metal part is decided before the mold is cut. A line drawn below 0.2mm on the artwork forces every later stage to compromise.
Artwork and Production Drawing
Our production drawings are made in PS, AI and CDR. That file is not just a pretty picture. It carries dimensions, colour numbers, the split positions of functional parts and any special process notes. If your source is a bitmap, a photograph or a rough idea, we redraw it into a vector file that can hold a mold. The detailed manufacturability rules (minimum line width, minimum fill space, minimum hole) live on our Custom Artwork Service page, so they are not repeated here.
Mold Design and 3D Drawing
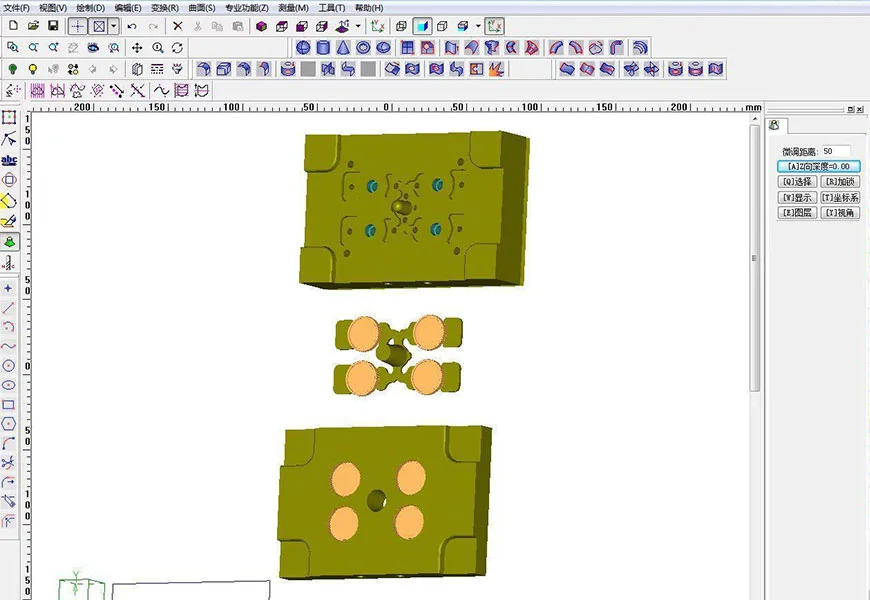
After the production drawing is confirmed we build the 3D mold drawing in Beijing JDPaint, so the shape can be viewed from multiple angles. This step exists because a flat drawing hides problems: relief edges that collapse, side undercuts and lettering that fills in are all obvious in 3D. You approve the 3D drawing, not the flat file, which cuts rework after the mold is cut.
Mold Engraving and Fitting
Engraving turns the 3D drawing into the physical shape on the mold insert, cut on a CNC engraving machine along X, Y and Z axes. Two steps follow that most people never hear about.
|
Sub-process |
Equipment |
What it does |
Why it matters |
|
Spark erosion (EDM) |
EDM machine |
Leaves spark texture in local areas. Discharge grades run 1 to 7, with 3 and 5 used most |
Texture is cut into the mold and finished before plating, so a matte finish costs nothing extra |
|
Mold fitting |
Milling machine, bench drill, bench tapping machine |
Cuts the runner, gate and waterway positions, plus drilling, tapping and ejector pin fitting |
Gate and waterway design decides whether zinc fills the cavity completely and whether porosity forms |
|
Heat treatment |
Heat treatment furnace |
Spheroidised annealing, stabilising, quenching and tempering |
Sets mold hardness, wear resistance and life. A well kept mold runs repeat orders for years |
The mold base is selected, the insert fitted, and the whole assembly is test shot on the die casting machine. The mold is finished only when filling is complete, ejection is clean and there is no flash.
Tips: Mold cost and ownership follow the usual trade terms. We keep your mold for three years and refund the mold fee once the order reaches 10,000 pieces. Reorders go straight back onto the existing mold at no extra tooling charge.
Stage 3: Die Casting
Die casting is the stage where liquid metal is forced into the mold cavity under pressure and solidifies into the part. It sets the skeleton of the product, and every later surface treatment sits on that casting.
Shot Casting on 88-Ton and 25-Ton Machines
The zinc alloy is heated to a liquid state, and the molten metal runs down the channel and fills the cavity from the injection nozzle, solidifying under pressure. We run both 88-ton and 25-ton hot chamber machines: the large machines handle thick parts, large faces and multi-cavity tools, the small machines handle thin parts, small items and sampling. The split is not cosmetic. Shooting samples on a large machine wastes alloy and inflates the mold amortisation on your quote.
Deflashing and Trimming
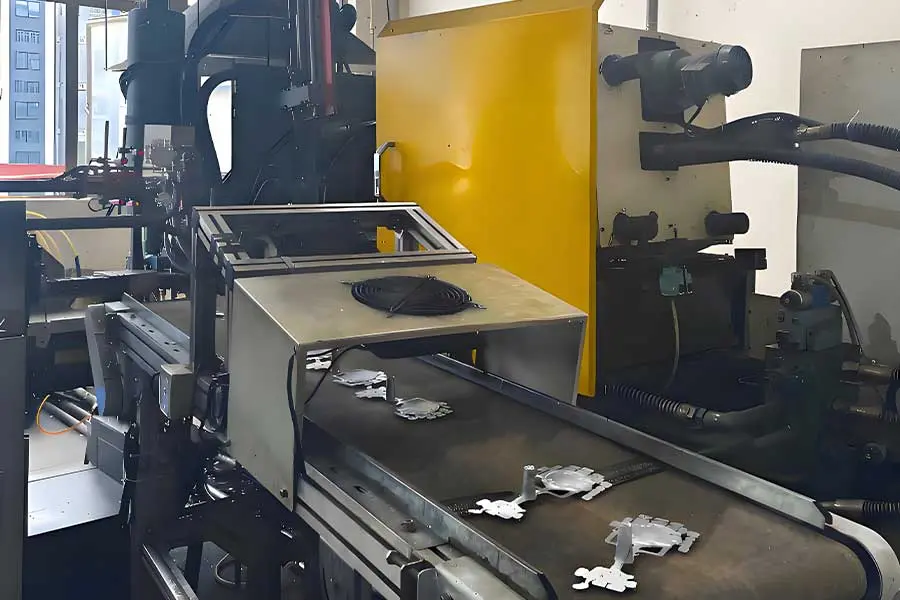
After casting, operators on the floor separate each part from its gate by hand. Difficult gates come away with pliers, burrs are taken off with a wire brush, and holes that the polishing machine cannot reach are hand filed. Every step here is manual, and this is the most underestimated stage in the whole line. Gate residue left before polishing turns into a bright spot after plating, and you scrap the whole batch to fix it.
Why Zinc Alloy
ZnAl4 alloys 3, 5 and 7 are the standard grades, and we run grade 3 (Zamak 3) as the default. The reasons are practical: it casts well and produces clean surfaces on complex shapes, its fluidity fills fine teeth and dense texture, it accepts plating, electrophoresis and spray painting directly, and it melts at 385°C, which gives a wide casting window without cold shuts.
|
Material |
Density |
Main forming method |
How we use it |
|
Zinc alloy Zamak 3 |
6.7 g/cm³ |
Die casting |
Main metal for badges, coins, keychains and bottle openers with relief |
|
Brass |
8.9 g/cm³ |
Stamping + cutting |
Higher density and less porosity, for flat and thick-gauge parts |
|
Iron |
7.8 g/cm³ |
Stamping + cutting |
Cheaper than brass but prone to rust, needs a protective plating layer |
|
Aluminum |
2.7 g/cm³ |
Stamping + anodizing |
Light, suited to large thin flat parts |
Stage 4 to 5: Polishing and Riveting
Polishing is the last rough stage before plating, and the first thing that protects your plating yield. Burrs and flow marks are exactly where plating builds up thick or breaks through.
Riveting Accessories
Backs, safety pins and screw posts are riveted onto the body after casting, with a bench drill pressing the accessory base into the zinc alloy joint. Three families cover most jobs: butterfly clutches and screw posts for badge backs, safety pins and simple pins for brooches, and misc riveted fittings. The metal thickness at the riveting point sets how strong the accessory holds. This is why some backs come out thinner than the standard. It is not a cost cut, the structure does not allow a thicker back.
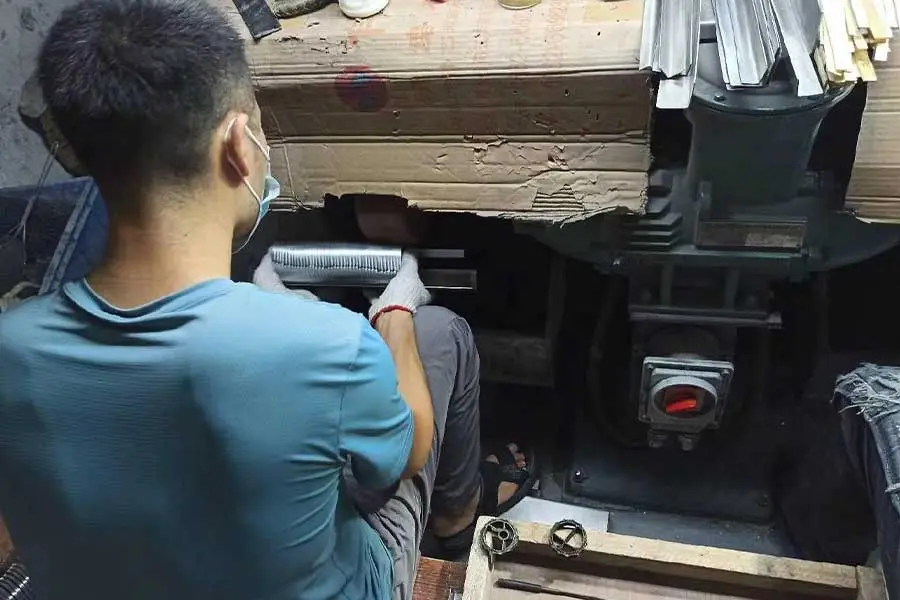
Edge and Face Polishing
Splitting into edge polishing and face polishing, both on the wet integrated grinding machine. Edge work takes off the parting line and edge burr so the part is safe to handle; face work removes flow marks and shallow scratches and raises the quality of everything that follows. The wheel is chosen by the depth of the relief.
|
Polishing Consumables |
Hardness |
Suited to |
|
Taro wheel |
Soft, medium or hard |
Soft for high relief, medium for low relief with lettering, hard for flat fronts and polished backs |
|
Abrasive belt |
Harder |
Flattening flat faces and edge gates |
|
Nylon wheel |
Medium |
General grinding |
|
Hemp wheel |
Standard |
Hardware, stainless steel, aluminium, plated parts |
|
Polish wax |
Auxiliary |
Speeds up polishing and leaves the surface smooth |
Stage 6: Surface Finishing
Surface finishing decides what a part looks like it is worth. The same casting in shiny gold and in antique tin reads as two different price points. Below we open up all three finishing routes, because this stage is the biggest single variable in both your cost and the life of the product.
The alkaline copper plus acid copper structure deserves its own note. Alkaline copper solves adhesion. Acid copper solves brightness. A plant that runs a single layer looks fine in the first week and then blisters in damp service or under constant wear. The other detail people skip is wax removal: polish wax left on the surface makes the plating lift around each wax dot, which is why the pre-plating ultrasonic bath is heated to boiling.
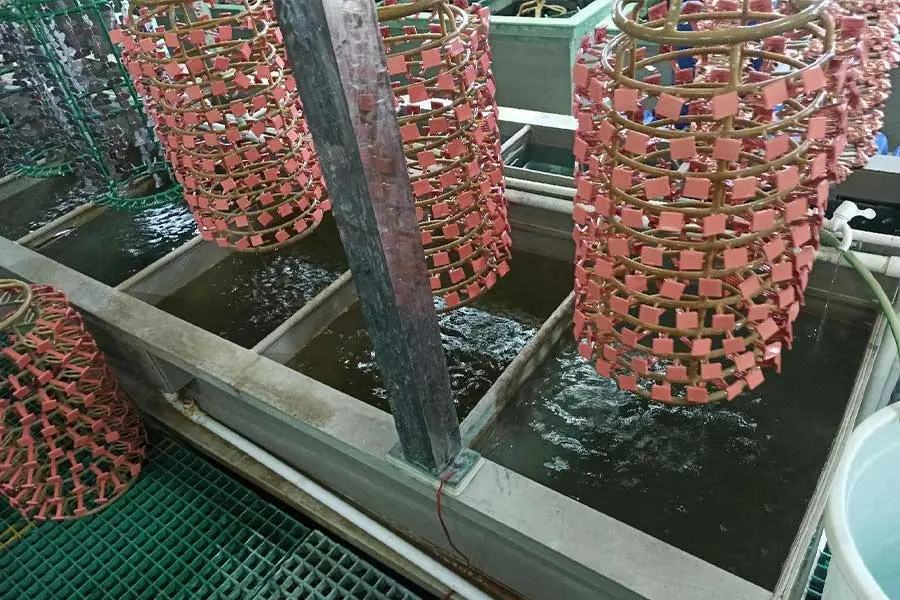
The colour list is long, but grouped by nickel content and gloss: nickel-free true gold, light gold, dark gold, light and dark imitation gold, nickel-free gunmetal, standard white steel, wear-resistant thick white steel, nickel-free thick white steel, rose gold, 18K gold, 22K gold, heavy gold, black nickel, antique tin, antique silver, antique copper, antique bronze, antique gold, antique nickel, bright nickel, thick nickel, mist nickel, mist silver, mist gold and mist imitation gold. For skin-contact products such as badges, dog tags and keychains we suggest you specify a nickel-free tone.
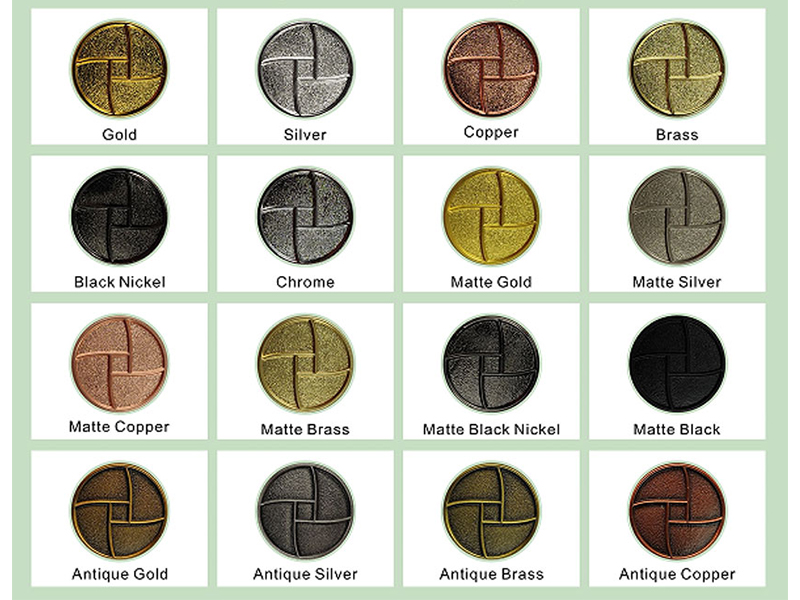
Plating: Thirteen Stations and Two Copper Layers
Plating is not one step. It is a 13-station line.
|
Station |
Step |
Equipment / material |
Function |
|
1 |
Wax and oil removal |
Ultrasonic cleaner heated to boil |
Strips polish wax left from polishing |
|
2 |
Hanging |
Jigs |
Conducts current, supports and locates the parts |
|
3 |
Ultrasonic cleaning |
Ultrasonic cleaner |
Removes dust and dirt |
|
4 |
Rinsing |
Five clean water tanks in sequence |
Washes off residue from the ultrasonic tank |
|
5 |
Alkaline copper strike |
Alkaline copper tank |
Lays a base layer so the colour that follows grips and does not flake |
|
6 |
Rinsing |
Clean water tank |
Washes off alkaline copper solution |
|
7 |
Acid copper brightening |
Acid copper tank, 20-60 min |
Raises surface brightness and gloss. Longest step in the line |
|
8 |
Rinsing |
Clean water tank |
Washes off acid copper solution |
|
9 |
Electrolytic colouring |
Plating tank: nickel, black nickel, pearl nickel, white K, bronze, imitation gold, antique tones |
Produces the final colour |
|
10 |
Rinsing |
Clean water tank |
Washes off excess plating solution |
|
11 |
Drying |
Tunnel oven, 100°C / 40 min |
Hot air circulating drying |
|
12 |
Oil spraying |
Electrostatic spray gun: matte, semi-matte or gloss lacquer |
Adds gloss and oxidation resistance and seals the plating |
|
13 |
Unhanging |
— |
Parts must be fully cooled and colour fully cured before removal. Packed fresh from the oven, the colour is not set and sticks to the box |
Electrophoresis: Antique Colours Without a Metal Plate
Electrophoresis deposits a paint film rather than a metal layer. Charged paint ions move to the cathode under voltage and react with the alkaline surface there to form an insoluble deposit that settles on the part. Its main advantage is coverage: hidden areas and deep recesses get a complete paint film, which spray painting cannot match.
The route runs deoiling (to strip release agent from casting), blackening (building an oxide film that gives antique contrast after sweeping), centrifugal drying, edge polishing, face polishing (a taro wheel removes excess black from front and back and lays in a brushed texture), hanging, ultrasonic cleaning, six clean water tanks in sequence, electrophoresis colouring, rinsing, tunnel oven drying, and unhanging.
Two details matter. First, the antique contrast comes from blackening and then sweeping the black off the raised surfaces, so recesses read darker. That is a property of the process, not a defect. Second, the hanging method is chosen by product: jigs run as hook hang, pocket hang and clip hang. Badges normally take clip hang, medals take hook hang, and the wrong choice leaves contact marks on the face.
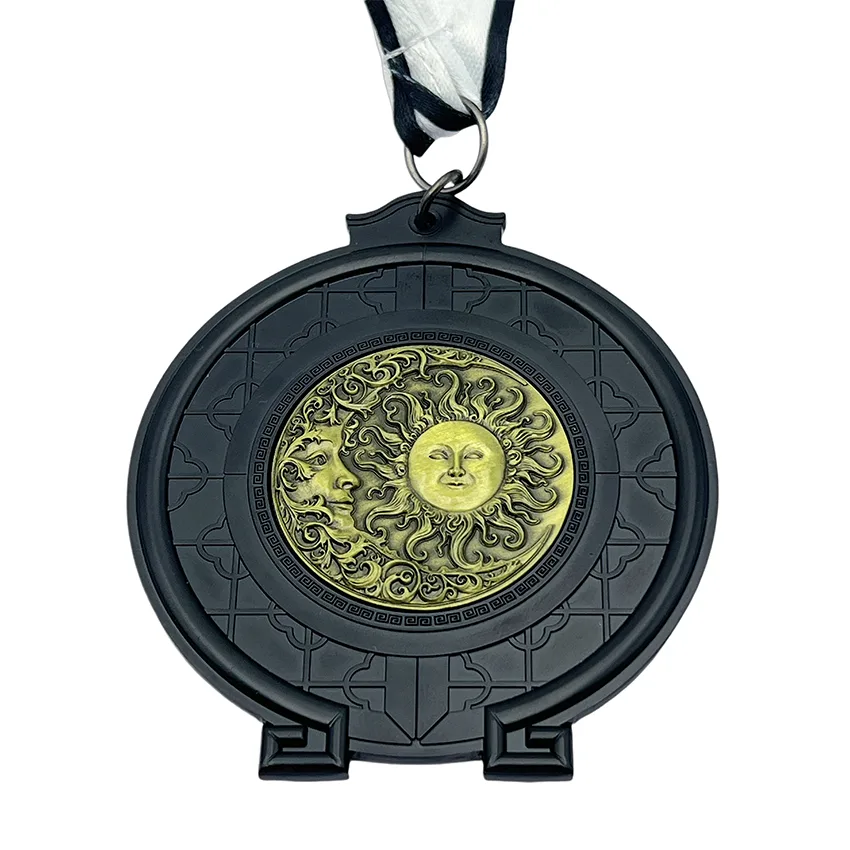
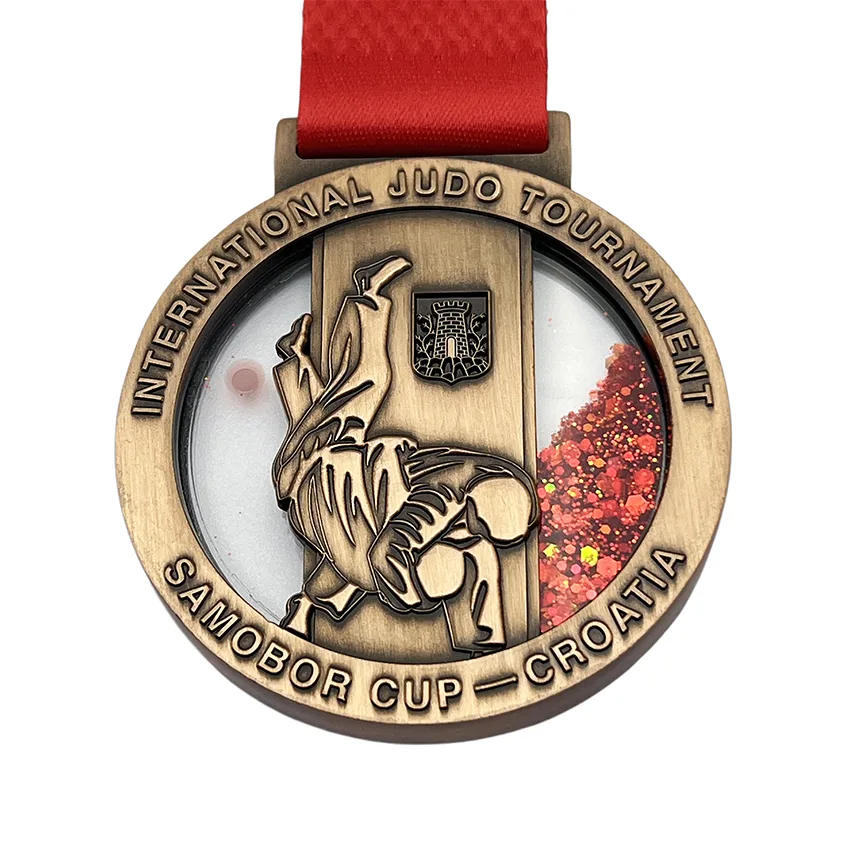
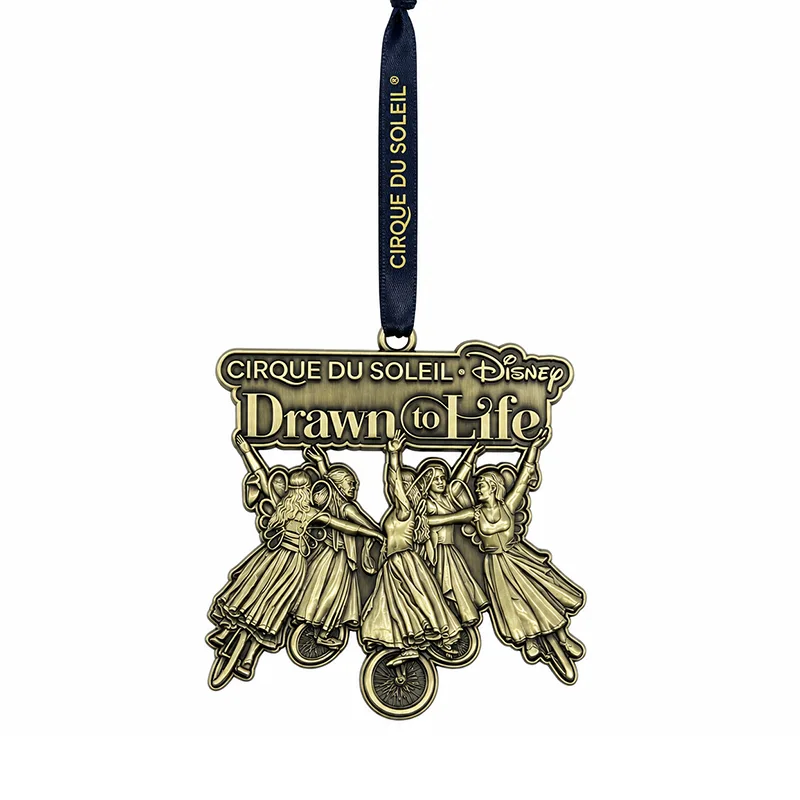
Common electrophoresis colours: antique gold, antique brass, antique copper, antique sliver, matte black and black Nickel.

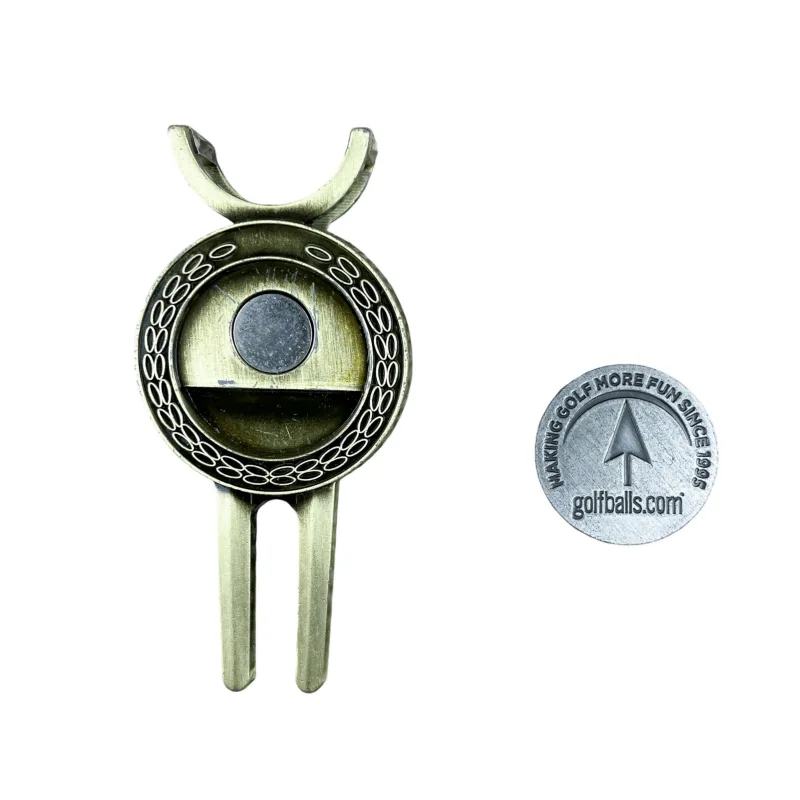
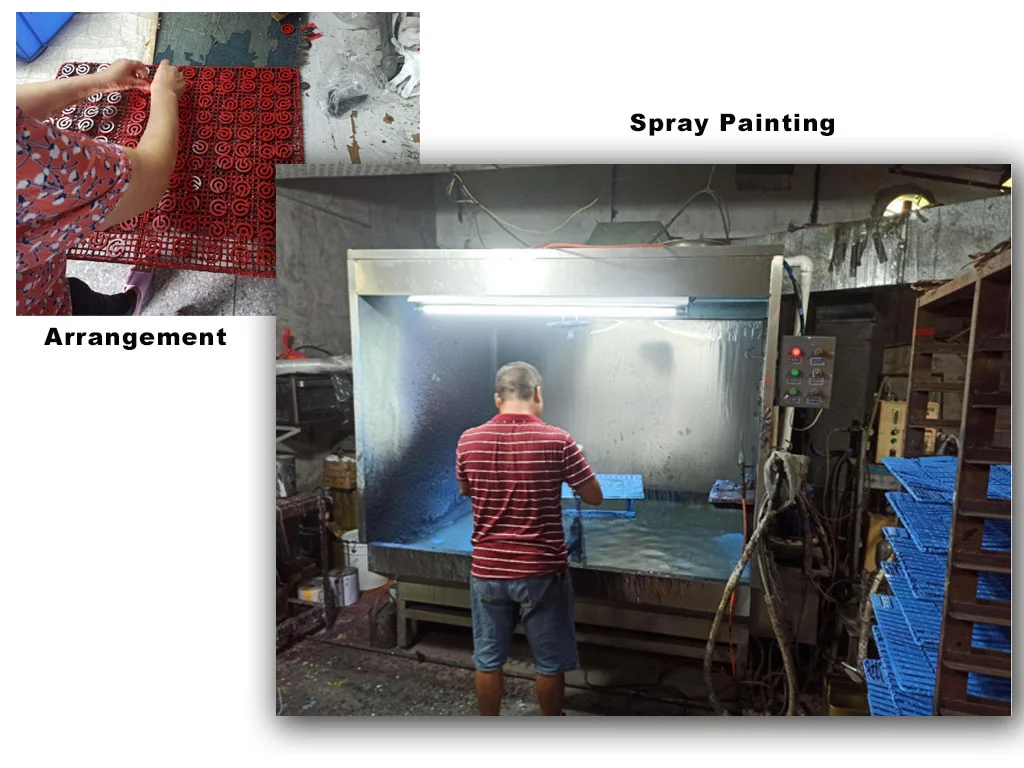
Spray Painting: Pantone Colours on Any Shade
Surface finishing decides what a part looks like it is worth. The same casting in shiny gold and in antique tin reads as two different price points. Below we open up all three finishing routes, because this stage is the biggest single variable in both your cost and the life of the product.
|
Dimension |
Plating |
Electrophoresis |
Spray Painting |
|
Surface layer |
Metal: copper, nickel, gold, silver |
Pigment and resin particles from the bath |
Atomised epoxy resin paint |
|
Gloss |
Metallic, matte available |
Paint gloss with strong antique contrast |
No metallic gloss, flat colour |
|
Coverage |
Strong, but watch deep recesses |
Strongest, hidden areas fully covered |
Weaker than electrophoresis |
|
Precision |
Set by the mold |
Set by the mold |
Set by the spray gun and tray layout |
|
Cost |
Highest |
Lowest |
Middle |
|
Typical use |
Gold, silver, rose gold and standard metallics |
Antique tin, antique bronze, matte and gloss black |
Customer-specified Pantone shades |
|
Sequence |
Polish, plate, then fill colour |
Polish then electrophoresis (fill and coat normally combine) |
Deoil, spray, cure |
Stage 7: Colour Filling
Colour filling puts colour into the recesses of the metal, and it is the stage your artwork depends on most. Colour deviation and bleed boundaries are both decided here, so the parameters below are given in full.
Filling Methods and What They Look Like
|
Color Filling Options |
English |
Flow |
Sequence |
Result |
|
Soft enamel, solid or translucent |
Soft Enamel |
Thin, flows well |
Plate first, fill second |
Clear raised metal edges with a slight dip in the colour |
|
Imitation hard enamel |
Imitation Hard Enamel |
Thick |
Fill, polish, then plate (reverse order) |
A rotary tumbler brings metal level with the colour. No dip. Fuller colour |
|
Solid glass enamel |
Glass Enamel / Stain Glass |
Thick, flows less than soft enamel |
Plate first, fill second |
Glass shine, brighter than soft enamel |
|
Translucent glass enamel |
Translucent Enamel / Stain Glass |
Same as above |
Plate first, fill second |
See-through effect |
|
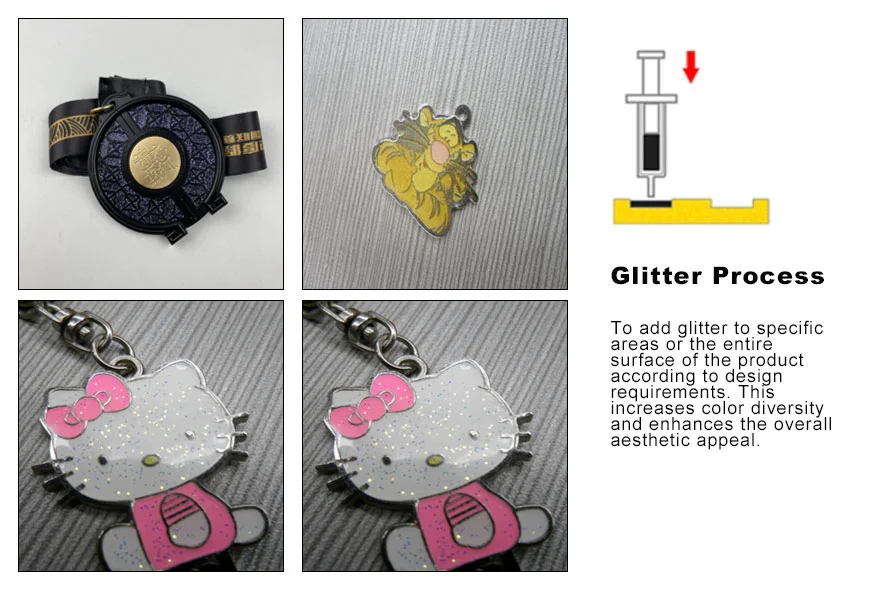
Glitter |
Glitter |
Applied on top of soft enamel |
Scattered evenly while the enamel is half dry during plate wiping, then AP film if needed |
PET polyester film cut to uniform flakes, iridescent or single colour |
|
Glow in the dark |
Glow In The Dark |
Powder or liquid |
Liquid is applied after the enamel fully cures |
Stores light releases a green glow in the dark. The effect always leans green |
Matching Pantone Colours and Removing Air
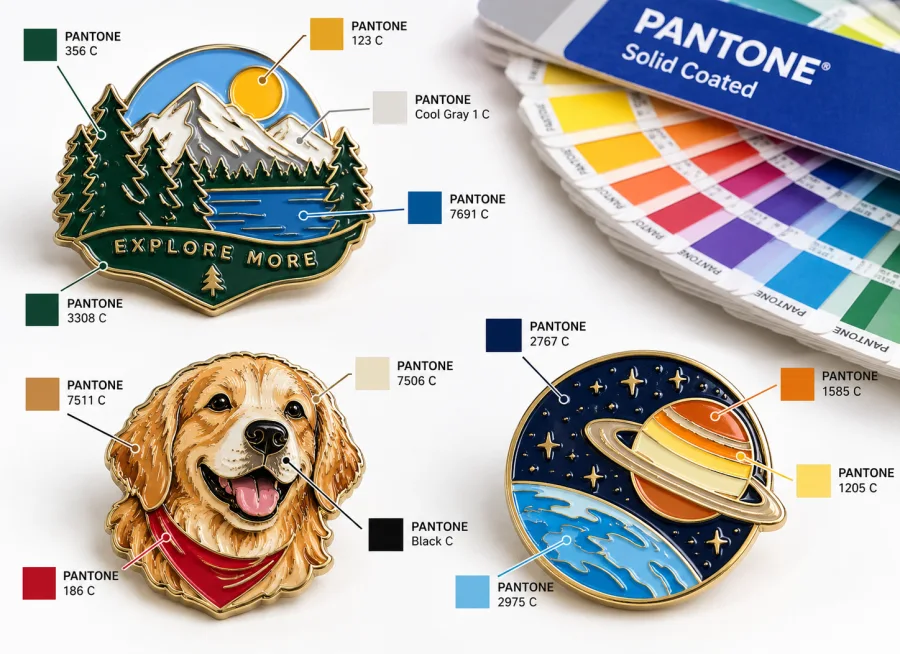
The master mixer works to the Pantone card, dosing pigment and thinner (thinner adjusts viscosity), then filters the mix. A rotary vane vacuum pump, model 2XZ-8B, then pulls the air out of the paint. That step is the whole defence against bubbles: air that has not risen comes out as pinholes in the cured fill.
Soft Enamel Vs Imitation Hard Enamel
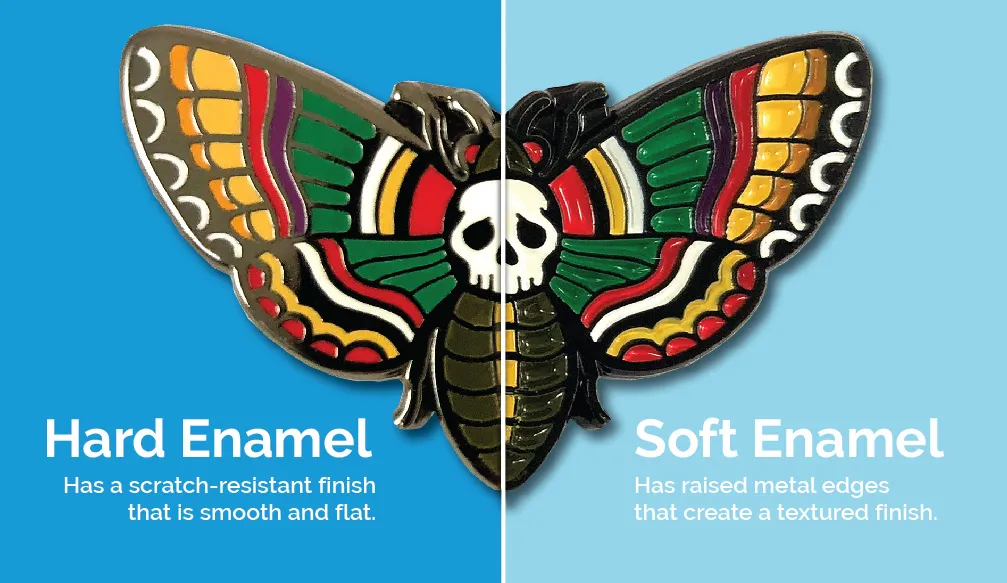
Soft enamel and imitation hard enamel differ in the direction of the sequence, and that direction sets the finished look. Soft enamel is plated and then filled: colour stays in the recess, metal edges stand proud, and the part has relief under your finger. Imitation hard enamel is filled, polished and then plated: metal and colour finish on the same plane, the surface is flat to the touch, colour is fuller, and both price and lead time run higher. Which one you want changes both the quote and the schedule.
Filling, Baking and Wiping
Two routes fill the part. One is the MST-V4P automatic colouring machine: a high-definition camera shoots a 360-degree panorama to auto-position the part, the software detects and skips already-coated areas, and it suits complex parts and large volumes. The other is a manual syringe for the corners the machine cannot reach.
Filled parts go into the oven in two stages.
|
Stage |
Temperature |
Time |
Purpose |
|
Low temperature baking |
60-70°C |
60-90 min |
Bakes to half dry only, so the next step can wipe |
|
Plate wiping |
— |
— |
A cloth wrapped over a flat metal face with alcohol lifts excess paint off the lines |
|
Final drying |
100°C |
60 min |
Cures the paint completely |
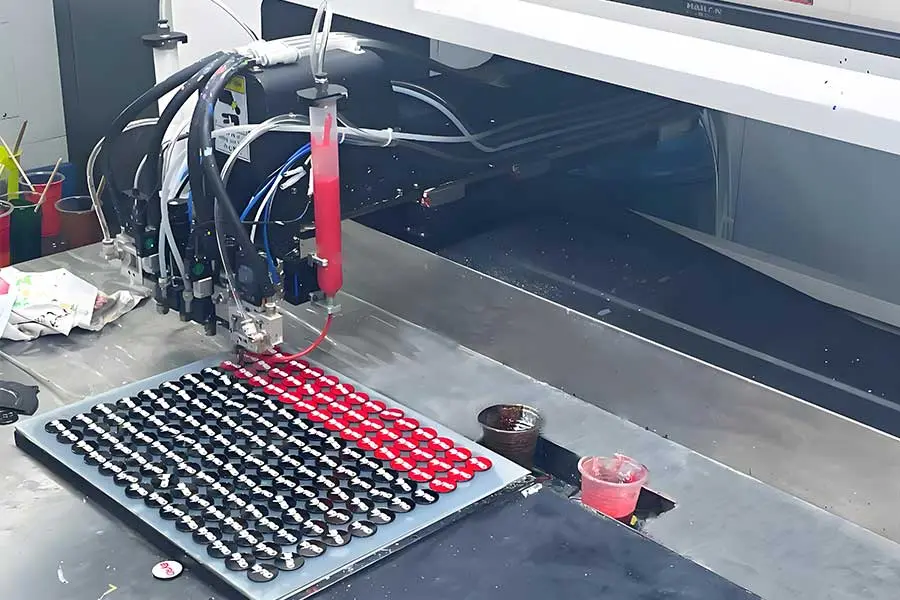 Automatic-Color-filling-Process
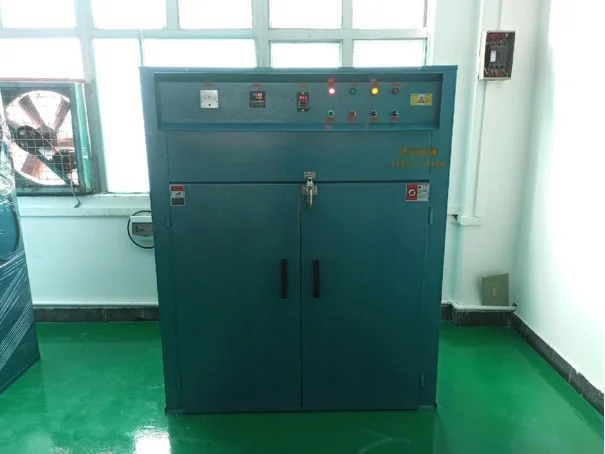 Industrial-Oven
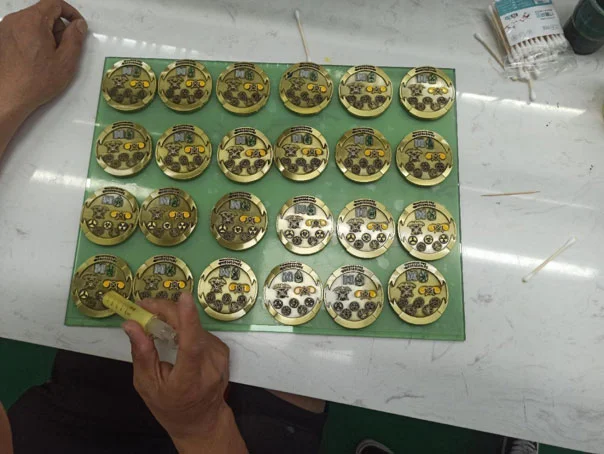 Manual-Coloring-Process
Plate wiping decides the fill quality. Wax or paint left on a line blurs the edge of a logo and closes fine lettering, and after that all the mold and casting work is invisible. This is the step where a good shop separates itself.
Special Effects
Sandblasting can be sprayed directly or injected with a syringe. It reads flatter than spark texture, and it is applied before or after plating depending on the product. Glitter and glow powder both go on while the soft enamel is half dry. An AP protective layer is added where the product needs it, most often on printed or printed-and-cured pieces.
Stage 8 to 10: Printing, Laser and Assembly
Casting and colour filling give the part its body. Printing, laser and assembly decide whether it lands as your design. The printing methods are not interchangeable: picking the wrong one does not degrade the result slightly, it makes the artwork impossible to run.
Three Printing Methods
|
Method |
Equipment |
What it renders |
Limitation |
|
UV printing |
UV flatbed printer |
Flat and 3D surfaces, printed straight onto metal or over a paint layer, supports photographic detail and gradients. Relief must stay within 7mm |
Beyond that limit focus loss costs sharpness |
|
Pad printing |
Pad printer |
Image carried from an etched steel plate to the part by a silicone head, ink matched to the material |
Not for large-area gradients |
|
Screen printing |
Vacuum screen printing machine |
Spot colour printing, priced by colour count |
No gradation |
|
Offset printing |
— |
Flat parts, normally finished with an AP protective layer |
Flat parts only |
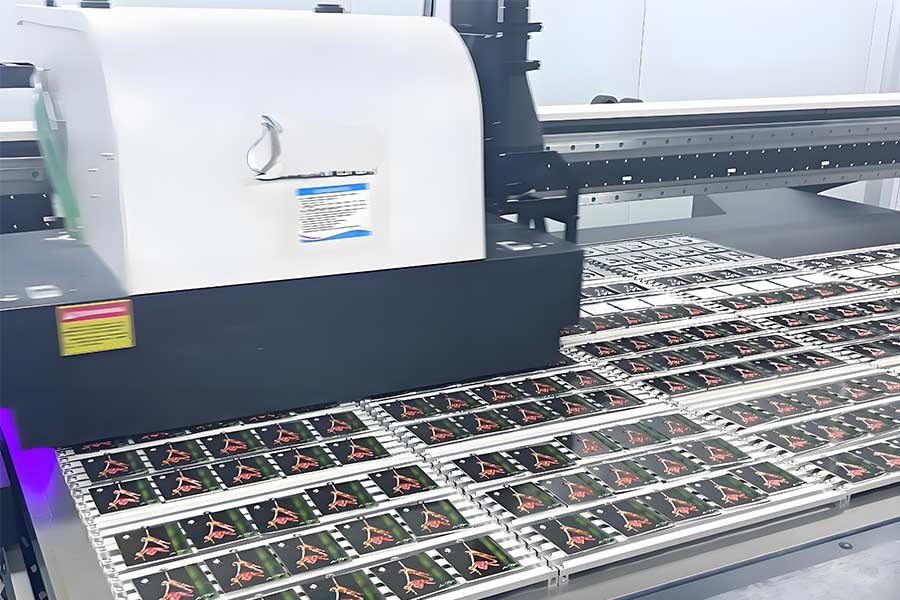
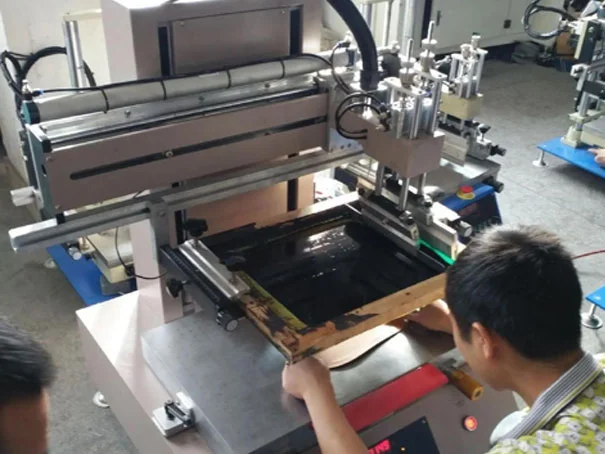
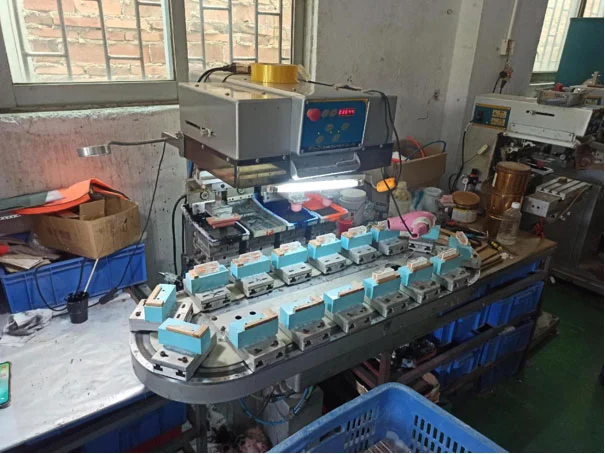
The 7mm relief limit on UV printing is worth flagging. If your artwork carries high relief or a large height difference across the face, UV sharpness drops and you should move to screen or pad printing, or split the raised face out as a separate stage.
Laser Marking
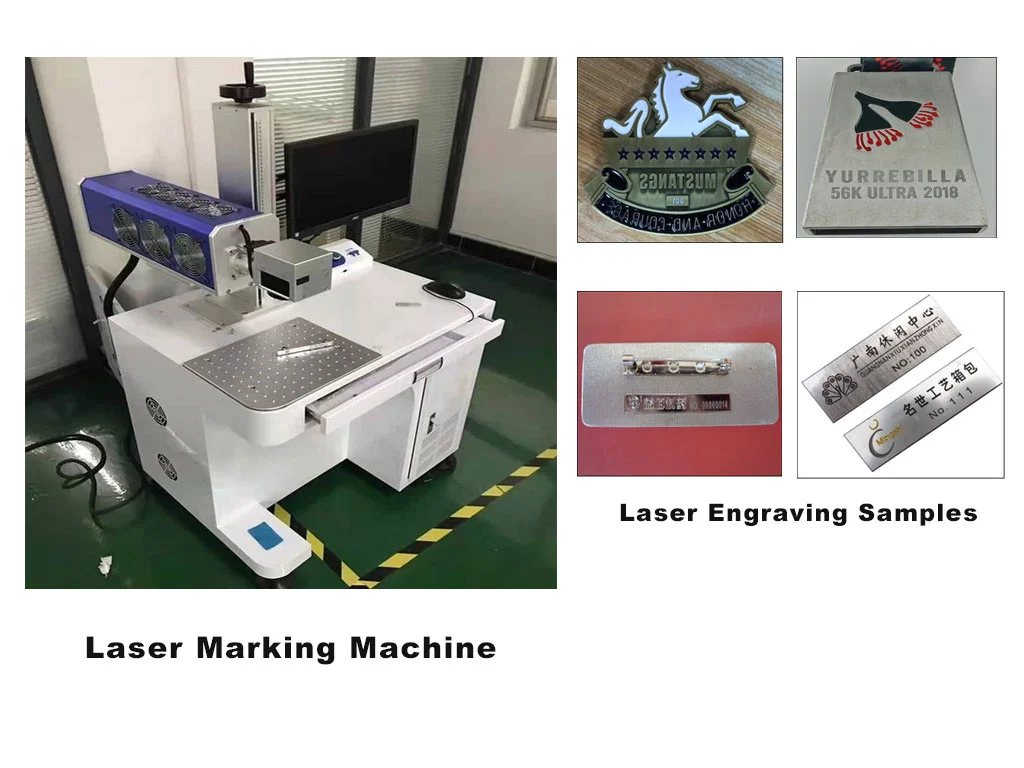
A laser marking machine puts a high-energy beam on the surface, converts light to heat in an instant and vaporises the surface to cut the text, shape or image. Its advantages are permanence and fineness. Fine lettering, serial numbers and QR codes hold better under laser than under printing.
Assembly: Clasps, Magnets and Ribbons
|
Assembly item |
Common forms |
Notes |
|
Clasp |
Swivel clutch, lobster clasp, split ring |
Standard connections for medals |
|
Magnet |
Round and rectangular in 2, 3, 4, 5, 6, 8, 10, 12, 15mm |
Bonded with yellow glue or AP glue |
|
Bought parts |
Movements, acrylic, electronic components |
Fixed with glue or compressed by screw |
|
Ribbon |
Heat transfer, nylon, faux suede cord, bead chain, satin, wax cord |
Pressed on by an ultrasonic plastic welder |
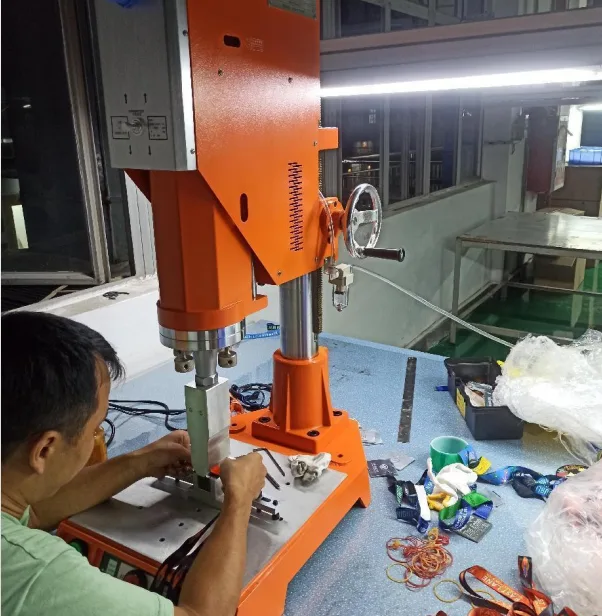
Ribbons are welded by an ultrasonic plastic welder: high-frequency electrical energy becomes mechanical vibration, then friction heat, which melts the fabric together. The magnet list gets asked about often. Larger diameter gives more pull but takes more space on the back of the part, so small parts end up limiting the magnet size. That is a structural trade, not a downgrade.
Stage 11: Packing
Packing decides the condition your goods arrive in, not just how they look. The pack format has to be fixed before cartoning because it drives carton dimensions and freight.
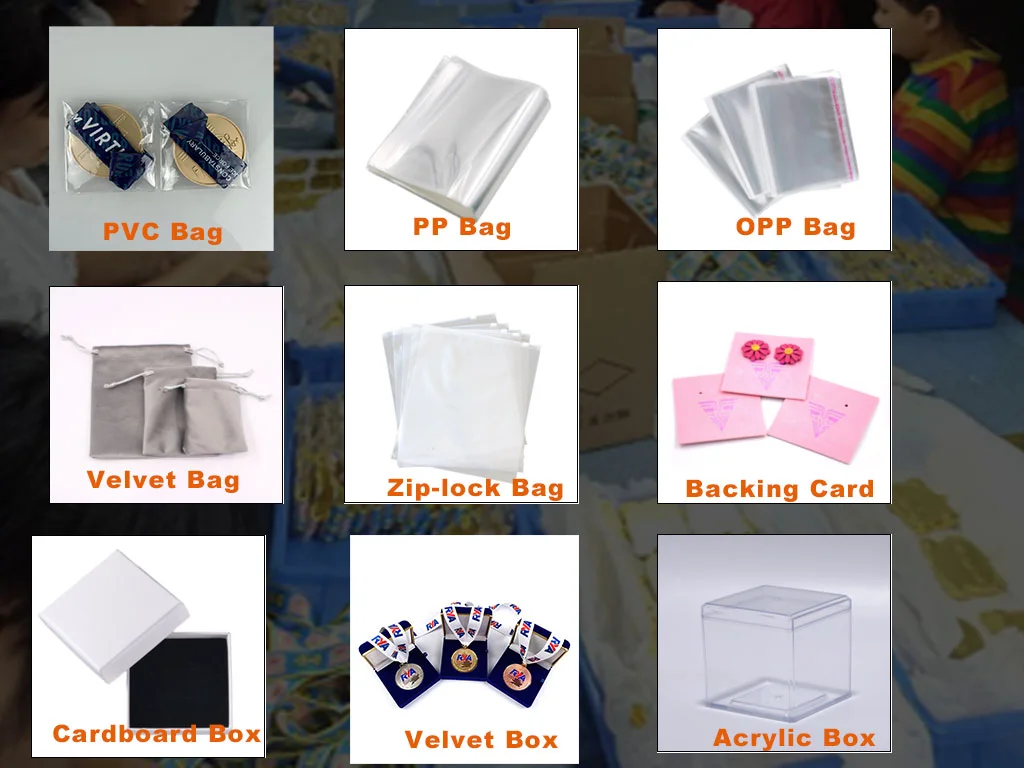
Choose by product need or protection: PP bag, OPP self-adhesive bag, zip bag, velvet pouch, paper card, blister box, velvet box, acrylic box, paper box, tin and gift box. Functional parts, meaning anything with a butterfly clutch, a magnet or a hinged structure, get an individual polybag or blister so they cannot scratch or knock each other in transit. Cartons are palletised to export standard with a packing list attached.
Hinged and rotating structures must be packed individually. That is a hard rule on our quality control page, because these are the structures that break first in transit. Full inspection points, measurable acceptance criteria and the pre-shipment inspection standard live on quality control.
Choosing the Right Finish for Your Design
The combination of surface finishing and colour method sets the positioning, price and durability of the part. This table works backwards from your artwork, which is faster than reading every option in turn.
|
Your artwork |
Recommended route |
Result and typical use |
Relative cost |
|
Bold lines, few colour blocks, metal relief wanted |
Plated gold or silver plus soft enamel |
Classic badge feel, edges raised, colour slightly dipped |
Baseline |
|
Flat and full colour wanted |
Plating plus imitation hard enamel |
Metal and colour on one plane, fuller colour |
Higher |
|
Translucent and bright |
Plating plus solid or translucent glass enamel |
Glass shine, brighter than soft enamel |
Above soft enamel |
|
Photography, gradient, multi-colour illustration |
UV printing |
Prints straight on metal or paint, photographic quality |
By complexity |
|
One or two spot colours, large volume |
Screen printing |
Spot colours only, no gradient |
Low |
|
A specified Pantone shade |
Spray painting |
No metallic gloss, any colour |
Medium |
|
Aged, vintage, military and collector tone |
Electrophoresis in antique tin or bronze with blackening and sweep |
Recesses read dark, strong antique contrast, fullest coverage |
Lowest |
|
Maximum flatness |
Plating then sandblasting |
Flatter than spark texture, billed separately |
Surcharge |
Three combinations worth warning about:
- First, soft enamel cannot carry very fine lines or dense texture. Below 0.2mm line width or under 0.3mm fill space, move to UV printing.
- Second, imitation hard enamel runs the sequence in reverse, so its lead time is longer than soft enamel. Confirm this early on rush jobs.
- Third, plating colour names must be written in full. Matt silver and silver are two different shades. We attach the shade card to the quote and the confirmation, and we give you the English colour name and a photo of the physical chip.
Zinc Alloy Die Casting FAQ
Send Us Your Artwork and We Will Quote the Full Process
You have now seen all 11 stages. The next step is direct: send us your artwork, your sample or just the idea, and we will tell you how that design runs on our line, which processes it needs, how long sampling takes and what the bulk order costs. With complete information we return a detailed quote in as little as 12 hours.